Updated: March 2017
Charging an electric vehicle (EV) is really easy and takes less time than filling your gas car – all it requires is changing the way you view ‘fuelling’. Rather than having to stop at the gas station multiple times each week, I simply pull into my carport and plug in my car each night! If you drive less than I do, you probably wouldn’t even need to plug in every night.
Types of Charging (or slow, medium, fast… and superfast?)
Now having just written above that charging an EV is easy, I’m going to add a few caveats to that statement – travelling with your EV beyond its range requires more thorough planning (see further down the page about PlugShare), and you will need to spend a bit of time initially to determine what ‘type’ of electric vehicle supply equipment (EVSE) you will need to use regularly. This is entirely dependant on how far you expect to drive each day. I have included a table below that shows different usage scenarios and suitable EVSEs for each (click the table to enlarge). It also shows the difference between the different “Levels” of charging (e.g. Level 1, Level 2, DCFC; or how I refer to them as slow, medium and fast!). DCFC has 2 different plug types for public stations, CHAdeMO and CCS (and a third proprietary standard used by Tesla, currently “superfast” – actually, it is the Supercharger!). Thankfully almost all new installations of DCFC chargers are including dual standard chargers, so all vehicles are covered.
-
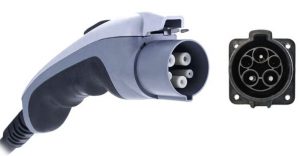
- Leve 2 (J1772) plug (source: zemotoring.com)
-
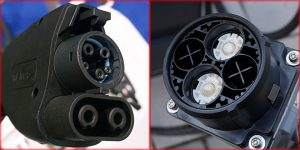
- CCS plug on the left, CHAdeMO plug on the right (source: chargedEVs.com)

Home Charging
As you can see from the chart, if you leave your car plugged in overnight using Level 1 charging (after all, you can’t drive it while sleeping!), you can expect a minimum of about 50 – 80 km of range by the time you need to go anywhere in the morning. If you have a carport or garage, you are probably ready-to-go right now! To use an outdoor plug, I would recommend upgrading it to be a weather resistant style, and double-check that it is on a GFCI.
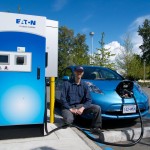
For my commute distance, I needed to install an EVSE that would allow Level 2 charging. There are a few ways to do this, but I did it the expensive way! I purchased a Schneider EVSE from Home Depot (about $900 at the time in June 2014) and hired an electrician to install it for me. Mine is an indoor unit that I mounted in my carport; they don’t seem to sell it anymore at that price, so here is another unit that is indoor/outdoor rated and a bit cheaper even, the Leviton EVB-32. Better yet, support a Canadian manufacturer in Quebec by purchasing the EV Duty; rated for our cold winters! (And, it is cheaper to boot!)
If you live in a strata (like we do), you will need permission from your council to have it installed (more details at this PlugInBC page on stratas). This portion of the cost is highly variable and could be anywhere from a few hundred dollars up to perhaps one thousand.
If I had to do it over again, I would instead purchase a portable Level 2 EVSE, like the EV Duty linked above. The unit costs about the same, but instead of hard-wiring the unit to the wall, you can instead plug it in to a 6-50 receptacle (or with the right adapter, a 14-50 receptacle, again have this wired by an electrician), and if you ever move, or travel to a friend’s house, you can just bring your Level 2 EVSE with you!
EVSE Upgrade sells all sorts of adaptors and will even upgrade the basic unit that comes with most vehicles to be more powerful.
For the more DIY crowd: another option is to build your own Open EVSE from kit parts, or to buy a pre-built EVSE built to the same standard – I purchased a unit from BSA Electronics and have used it on a number of my road trips with great success.
Travelling
So why would you want to travel with your EVSE? In the interior of BC (Kootenays and central/northern BC), our charging infrastructure is rather spread out at the moment (though in 2017, this should change substantially), so if you have a few key adapters (TT-30 adapter and the one listed above), you can charge at a campground. Campgrounds commonly have 125V/30A power, which you can use with the TT-30 adaptor and the charger that comes with your car, though it will still only charge at a speed as if you plugged into a 120V/15A wall outlet. With out Open EVSE unit, we can actually utilize 24A from that TT-30 plug, which I refer to as “Level 1.5”, because it is a bit over twice as fast as plain Level 1 charging (but not 6x as fast, like regular L2!)
If you buy one of the 240V capable EVSE’s linked above, you can use the 240V/50A 14-50 outlets at RV parks to get up to 40A of power – that will allow you to charge at full Level 2 speed for almost all EVs on the road in 2017.
But, good news, the network of public chargers is always expanding (and is well established in the Lower Mainland and Okanagan), and so is the Direct Current Fast Charging (DCFC) network. A DCFC charger can give you up to 80% of your charge in 30 minutes! That makes road trips much better than using Level 2 infrastructure. Level 2 will always have its place though, for shorter trips and for “destination” charging.
Check out this video I made to show how to use a DCFC in BC, and how fast it can charge your car.
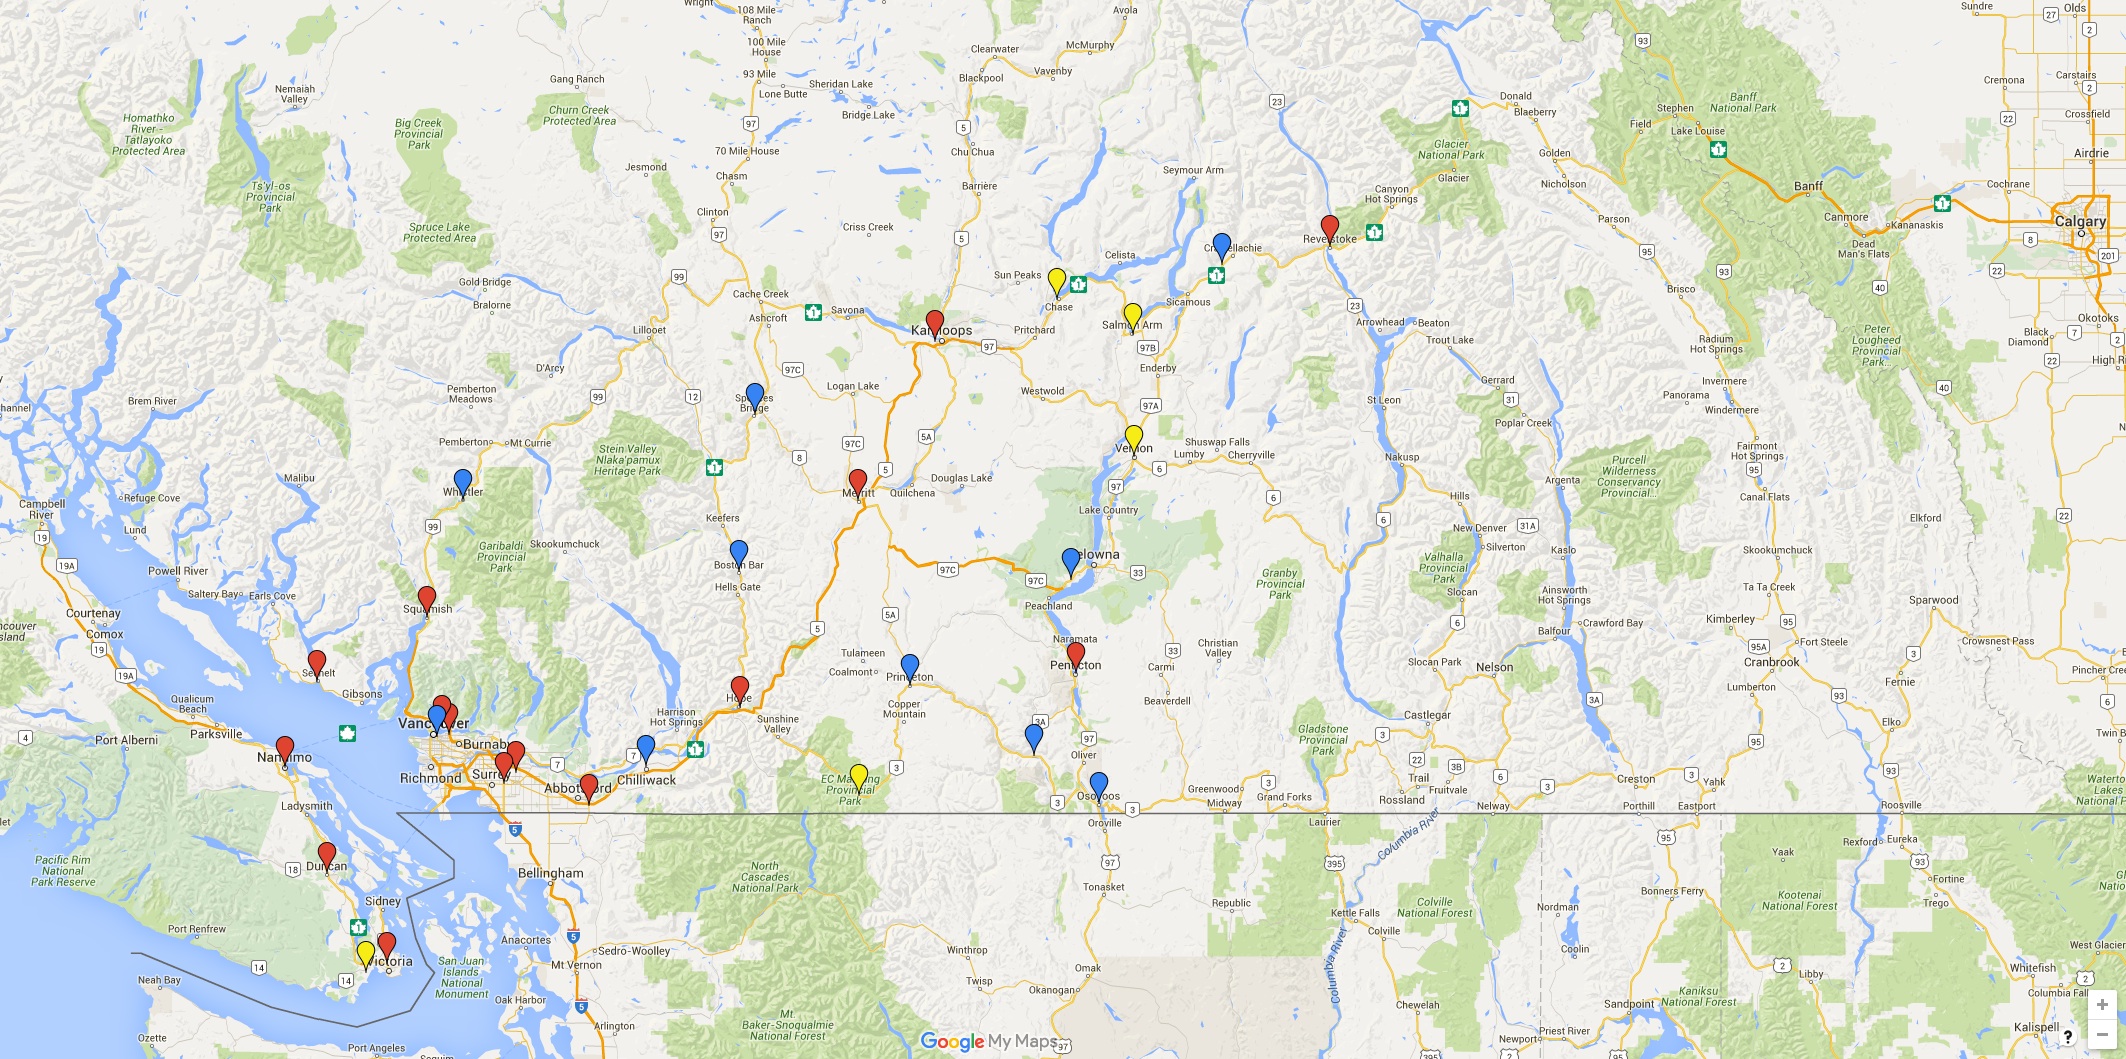
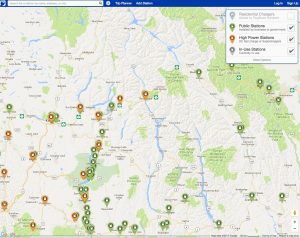
Click to enlarge – this map showed the status as of Sep 2015 of DCFC units in BC: red icons show chargers that are constructed and operating, blue/yellow icons show future stations (to be installed by mid 2016). An additional phase is being planned at the moment, though it has yet to be finalized and still requires additional funding to be implemented.
-
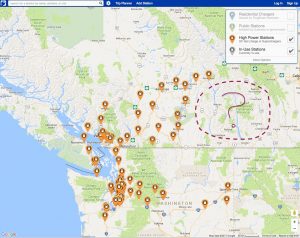
- As of March 2017, first 30 in BC are done… more coming soon I believe!
-
- Level 2 and DCFC chargers available as of March 2017
Speaking of charging infrastructure, you will of course want to know how to find public charging stations! Many of the EVs with navigation have a built-in “charger finder” system, but I wouldn’t rely on them to be up-to-date, especially in remote parts of Canada.
Instead, head over to PlugShare, the most comprehensive source of public infrastructure. If you create an account, you can also see personal charging points that other users have shared, and you can share your own if you wish (ours is listed, just look in the Fairview area of Nelson).
Information is crowd-sourced, and users leave valuable feedback on how reliable the charger is, and what types of services might be available nearby.
Wikipedia has a pretty comprehensive article on the technical aspects of EV charging if you want the nitty gritty.
Click on the first image in the photo gallery below to see an example of each type of charging, Level 1, 2 and DCFC.
-
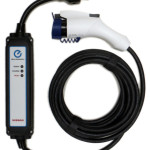
- EVSE for a Nissan Leaf, used for Level 1 charging at ~1kW
-
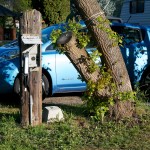
- Level 1 – “trickle charging” at ~1kW at a campground
-
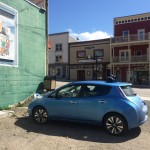
- Level 2 charging at a public EVSE in Rossland at ~6kW
-
- DCFC charging at the Surrey Museum at a Direct Current “Quick Charger”, ~30kW
-
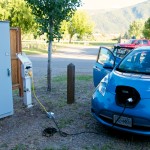
- Charging at the Grand Forks municipal campground utilizing the 14-50 outlet with the Open EVSE set to 30A – charging at max speed!
-
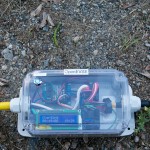
- The Open EVSE has a clock and shows time elapsed for charging. It is watertight and all of the settings are accessed using the one button with a combination of long and short button presses – pretty intuitive actually.
-
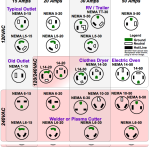
- I have adaptors for the straight-blade RV plug (TT-30), new electric dryer (14-30) and new range (14-50). There are quite a few types of 240V receptacles out there!! Thanks to By Orion Lawlor – Own work, CC BY-SA 3.0, https://commons.wikimedia.org/w/index.php?curid=15900896 for this image.
Pingback: A Tale of Two Journeys – Part 1 | Kootenay EV Family
Pingback: A Tale of Two Journeys – Part Two | Kootenay EV Family
Pingback: 50,000 km and cost update | Kootenay EV Family
Pingback: Hello from the New West EV Family | Kootenay EV Family
Pingback: Day-trip: Nelson to Crawford Bay area – Kootenay EV Family
Pingback: 2017 starts with a bang! – Kootenay EV Family
If you don’t mind continuing the conversation, I’m trying to make a decision on an EVSE and there are a couple of options that look good. The Outlander only has a 12kWh battery so it allows me to charge it up over night via the Mits-provided 110 wall charger. Am looking forward to putting a faster charge into via a Level 2 EVSE, but I’m also trying to think ahead for the next EV on our driveway that will have a bigger battery and perhaps a faster uptake rate. The two I have in mind:
JuiceBox® Pro 40 with JuiceNet – https://emotorwerks.com/store/residential/juicebox-pro-40-smart-40-amp-evse-with-24-foot-cable
Open EVSE Advanced Series – 40A Charging Station – https://store.openevse.com/collections/frontpage/products/advanced-station
I also looked at the BSA product, which mods the Open EVSE product listed above, and looks great/functional with the custom work particularly those long braided cables. But as much as I like the looks of the product, functionality and the company history, it looks like there is an 18 day build wait.
What are your thoughts?
A 40amp unit will be plenty, even my 30amp unit will fully charge a large Tesla battery pack overnight.
Either one looks like it would be a fine option. I do like the idea of connected units, particularly ones that would allow a schedule to be programmed (my charger has a delay timer, which I use to have the car start charging at roughly 3am so it is fully charged just before I leave for work).
There are two other Canadian manufacturer’s to consider also:
– http://www.timetoelectrify.ca/product/evduty-smart-home/
– https://flo.ca/at-home
They are a bit more expensive, but I think have some additional features. Having said that, since I haven’t shopped for an EVSE in a while, I’m not up to speed on the best solution out there.
Good luck!
When I was looking for a secondary charging system to supplement my Tesla HPWC, I looked at Juicebox. At the time, it didn’t have the necessary approvals to make it a safe choice in Canada – at least, not if you wanted your fire insurance to remain valid! Since that time, I understand it has been upgraded to meet Canadian safety requirements.
I liked the idea of the Juicebox because of the wifi and metering abilities. However, I ended up with a FLO X5 instead, because the FLO also does metering and talks to the cloud, but with the approvals I needed at the time. So far so good with the X5. I would buy another if I needed one, but I’d now consider the Juicebox too.
Finally, another option that most people don’t consider is the Tesla HPWC. It’s a pretty solid unit and allows you to load balance with another HPWC on the same circuit. However, it has the typical Tesla plug on the end of the cable…which – surprise – you can still use with a J1772 vehicle! I picked up a JDapter Stub, which also sells under another name that escapes me at the moment… it lets me plug my Tesla HPWC into the J1772 connector in my i3.
If you’re interested in a mobile solution, the Tesla UMC should also work with the JDapter Stub. The UMC allows you to connect a variety of plugs, meaning you can plug into 120 V and a variety of 240 V sockets, assuming you have the right bits in the bag. It’s small enough to carry with you (it’s what Tesla provides for travel) and is able to provide the maximum current and voltage your car will accept. Well priced too. I think I saw one of the companies that make the Tesla to J1772 adapter also advertising a Tesla UMC already adapted to provide J1772 without the Stub. Another possible option…
I’m pretty sure the Stub explicitly says it won’t work with the Tesla UMC actually… see Note 3 on this page https://shop.quickchargepower.com/JDapter-Stub-Tesla-Charge-Station-Adaptor-JDPTRSTB.htm;jsessionid=E9789001E0F8DABCC002422A39B9DB26.p3plqscsfapp005
I think it’s just the European Mennekes version that won’t work… that link seems to support both HPWC and UMC…. “Plug any modern EV in North American or Japan into any Alternating Current (AC) powered Tesla UMC / mobile connector / HPWC / wall connector. “