
Hello again from the New West EV Family!
In my last post we discussed planning our road trip south to the Seattle area with our 2013 Nissan Leaf and the preparations required to access the charging networks we would need to visit. In this post I will discuss the energy planning and the results of the first half of the trip south.
I have always been an avid reader of online adventure blogs, whether it has been cross-country Volkswagen TDI travel logs, photo journalist travel logs, adventure-rider tales, blue water yachting blogs, or more recently, early adopter Nissan Leaf trip logs on www.MyNissanLeaf.com (MNL). This is how I came across Andrew’s www.kootenayevfamily.ca and Rebecca’s www.bceventure.ca blogs. Through my reading I learnt that early adopters of the Nissan Leaf develop a drive plan when they take their Leaf into uncharted territory, that is territory beyond the vehicles range, in order to ensure success of the trip.
“Plan the Drive and Drive the Plan.”
While our trip to Seattle wasn’t exactly uncharted territory I wanted to develop a drive plan for a number of reasons:
1) the experience of crunching the numbers as I love to play with Excel
2) to ensure myself and the family success of the trip
3) to know where we can potentially skip quick charges
4) to have backup plans set for the regular occurrence of broken chargers
5) get some experience with planning in the event we undertake a more challenging trip.
The typical EV drive plan is constructed in Excel and computes the kWh consumed over the distances, ascents, and descents traveled based on typical energy consumption of the Nissan Leaf. MyNissanLeaf.com members (MNL’ers) will often also compare this to the website www.EVtripplanner.com. I chose not to do this as I find the website slow and crashy on both on my iMac at home and my PC at work. I suspect I need to give it a second chance though, and I love their website graphics!
I based my Excel sheet from Andrew’s examples as well as those I had viewed on MNL. Andrew has shown his here on his blog several times. I wanted to construct my excel sheet from scratch as I really wanted to understand everything about it from the ground up. I also used it to estimate charge time based on charger type and capacity and my desired charge target% for the next leg. I also used it to calculate a safety factor based on how much energy the next leg of our journey was going to require and this is the information I used to decide when it would be safe to skip a quick charge. I have gone through several versions but what is shown below is the most recent version of my planning sheet.
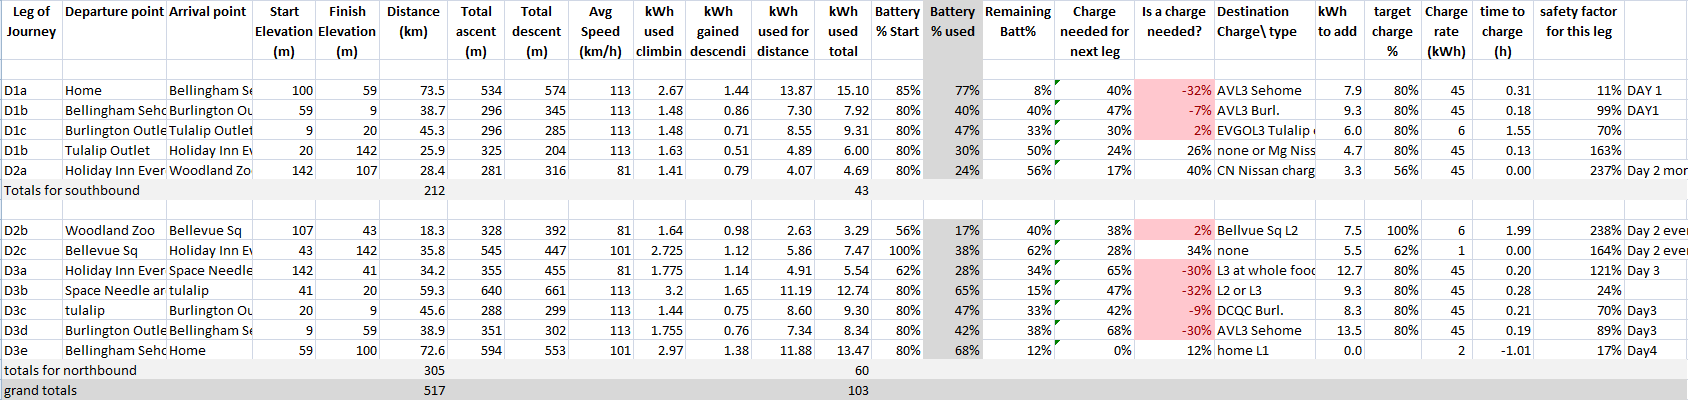
Click to view my Excel Trip Planner
Elevation change information was gathered from this very useful site, but can also be obtained from Google Maps using the biking directions . Additionally, I made the assumption based on battery age and LeafSpy data that my Leaf probably has around 19.7 kWh of available energy. I chose to use a value of 5.0 kWh used per 1000 m ascent and chose to use 2.5 kWh regenerated per 1000 m descent (typical values floating around the net are quoted in 300m increments). Andrew has noted on his blog how he suspects the regenerative braking efficiency may be closer to 80% than the 50% figure I used. There is some debate about regen efficiency on MNL and likely it is different in different situations. To be conservative I used 50% to start.
My planning also accounted for the worst case scenario in travel speeds (driving faster uses more juice) and also reduced my estimate of energy regeneration compared to the accepted norm (see above). Even with these worst case variables this trip is a cake walk if all the DCFC’s are functioning. The map below shows how the distances between DCFC’s are about 30-50 km. It would be interesting to see what our actual energy consumption and km driven were, so I printed this worksheet with extra rows to record actual charge percentages and distances as the trip progressed. It was evident early on that our average speeds were slower than planned and we charged closer to 90% at most DCFC’s, whereas I assumed I’d fast charge to ~80%. This trip plan was truly a worst case scenario and there were many built in safety factors. That being said the trip wasn’t completely devoid of anxiety for us.
Since you are reading this blog and interested in EV’s, it’s fair to assume you have read and heard about range anxiety. I think in the early adopter days of 2011 and 2012 this anxiety was real. However in 2015 the EV infrastructure has been progressing nicely in BC, Washington and Oregon. Unfortunately (or maybe fortunately) range anxiety has been made obsolete with charger anxiety. The question now is will my destination charger be occupied or functional when I arrive? We would encounter some of these issues along the way.
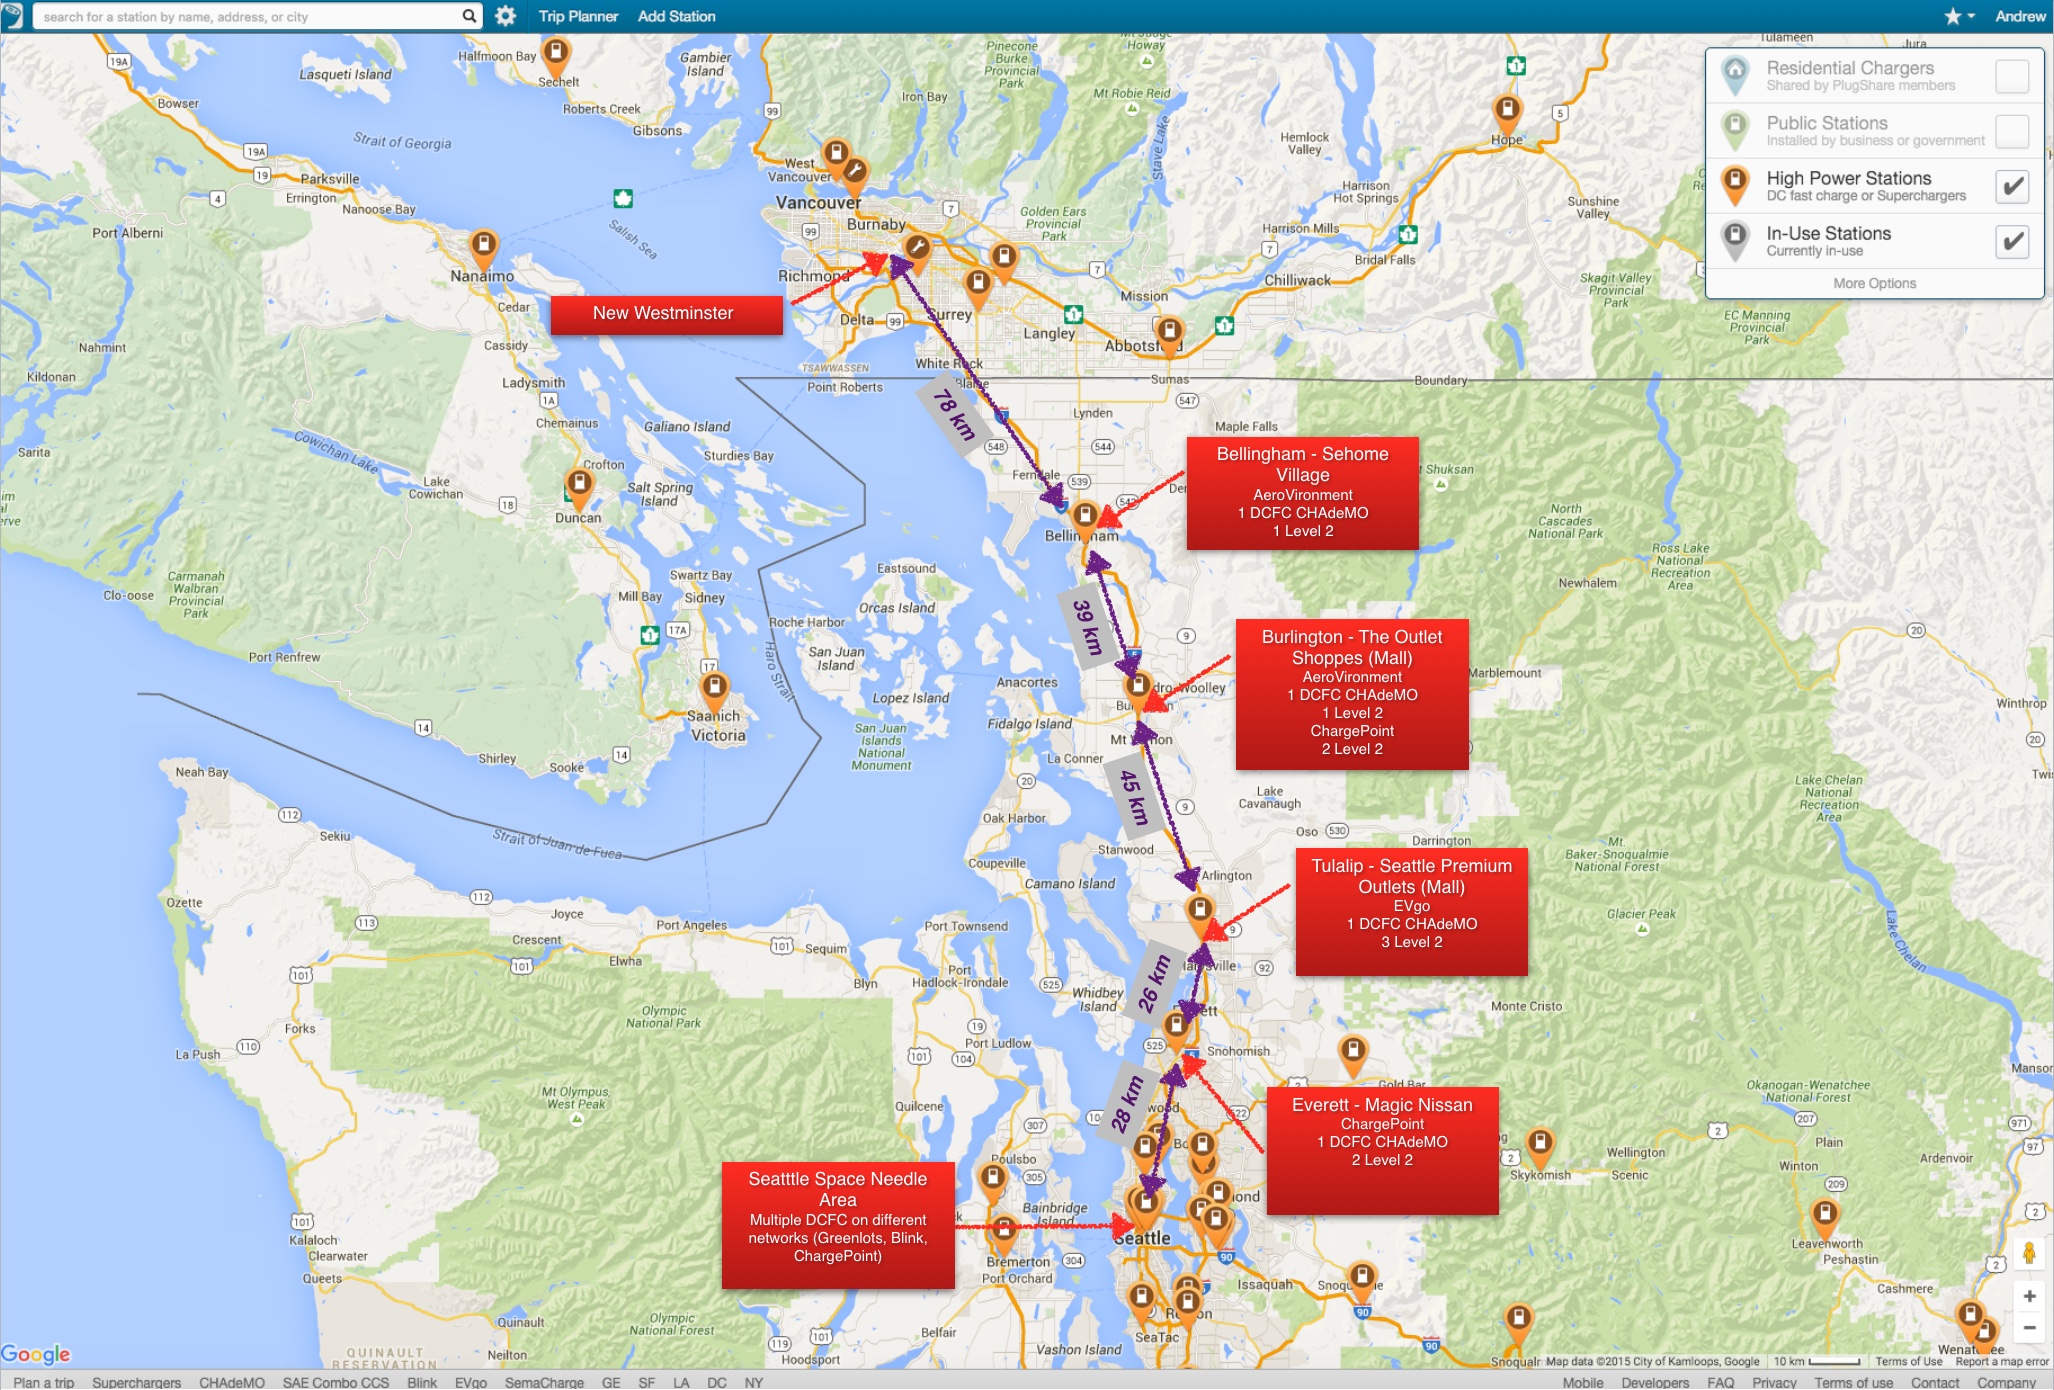
We left New Westminster, BC around 1:30 pm with a 94% charge and 131 km showing on the GOM (guess-o-meter). We crossed the border at the Peace Arch only waiting about 5-10 minutes. We then cruised at about 100-110 km/h to Bellingham where we exited and found our way to the Bellingham Sehome Village AeroVironment DCFC with 37% remaining and 53 km remaining on the GOM. Our average speed showed only 73 km/h due to the border wait line presumably. We used 57% of the battery and my drive plan said to budget 77% so we did well.
A Leaf was just driving away as we arrived at the DCFC so we had the place to ourselves. Sehome Village is a nice little shopping area including REI the well known outdoor equipper (similar to MEC for Canadians), Starbucks right there for those addicted to their elixers, and access to the interstate is easy. We all held our breath and scanned the AV RFID fob…… which did not work! FOB INVALID!
Cue the frantic 5 minute roaming phone call to AV who couldn’t even find me in the database! I was miffed to say the least. They started the charge remotely for me quite quickly, but I remained on hold, trying to get the fob working. They were entirely unhelpful so I hung up to cut my voice roaming losses. Using free WiFi at REI, I logged onto the AV website and it showed that my fob was NOT active. What you say!?! I checked that before I left and it was a-okay. I tried to reactivate it and it was a comedy show. Please enter the 7 digits of your fob after the asterisk. My fob had 8 digits after the asterisk. The website would not take the 7 digits it wanted but took all 8, surprise! It said my fob was already registered-shown right there on the website with all 8 digits, not the 7 requested. I made another upset phone call lasting another 5 minutes all the while trying to scan my fob. I don’t really know what happened, but the fob magically started to work. Although the AeroVironment CSR didn’t conclusively do anything, I suspect they read the RFID of the last charge event over the network and forcefully activated it – a sigh of relief for our next stop. We charged to 93% with the GOM showing 125 km.
We had only 39 km to go to Burlington outlets AeroVironment DCFC. We were just finishing up in Sehome when a silver Leaf with WA plates arrived. He was an early adopter (bumper stickers and plate frame gave him away) with a 2011, returning from Metro Vancouver for vacation and he relayed his stories of racking up roaming charges in Vancouver trying to get online with our Greenlots DCFC’s! Sounds familiar now!
Route of David’s planned journey, showing major charging locations. (Click to enlarge)
It was a short jump to Burlington Outlet mall where the next AV DCFC was waaaay in the back of the parking lot. Fob scanned and success authorizing! But the charge failed to start! I tried 7 times to start the charge each attempting taking 2-3 minutes as the machine when through its checks, validation, and authorization each time. The issue was I had not turned off the Leaf. In my newbie roadtrip excitement did not realize that a quick charge session could not initiate with the car still on (though one can turn the car back on after the DCFC has started.) Standing in front of the car you don’t realize it is on, I turned the car off and on the 8th try it started charging just fine.
Right at that moment the same silver 2011 Leaf pulled up to the DCFC also headed south with us. We had a chance to talk a little more and I cut my charge off so he could start. I was planning to head to Seattle Premium Outlet to test the EvGo card and DCFC so I didn’t really need much juice. The dash now showed 88% and 132 km on the GOM having traveled about 38 km from Bellingham. Battery temperature bars were up to 7 while ambient temperatures were around 25 *C now. I think we turned on the AC for a bit. Since the other gentlemen was paying al-la cart and I was a little ticked with AV I gave him a free charge on my fob and we were off to Seattle Premium Outlet NRG EvGo 45 km south. We probably could have skipped the charge at Burlington, but charging here on the unlimited AV monthly plan would mean I’d pay a few cents less at the next stop!
We arrived at Seattle Premium NRG EvGo Freedom Station at column A20 in the parkade structure with parking for more than 8 EV dedicated stalls; there were several L2 outlets as well. Nice easy parking for EVs at the perennially busy outlet parking lot! The EvGo DCFC required some finger tapping on the touch screen after swiping the card but it started right up. The one downside to this location is no immediate access to the mall. You have to hoof it North or South a few extra minutes but if that cuts down EV ICE’ing then fine with me. Banana Republic and Starbucks have the closest free WiFi.
For the next leg south we would spend the night at the Everett Holiday Inn. The leg from the EvGo station was planned to be 26 km. We arrived with a battery level of 73%. Unfortunately there is no L2 nearby, nor does the hotel have exterior L1 sockets. Bummer, but we did know this in advance as I had inquired via e-mail at the hotel several times. After meeting our travel companions at the hotel and having dinner out at Red Lobster, we drove about 3 km north of the hotel to Magic Nissan squeezing in our 4th DCFC of the day just before the 8:30 pm closing of the dealership. The battery temperature bars stayed at 7 cooling to 5 bars the next morning. We made a wrong turn going to dinner nearly doubling our distance driven so we started charging with 50 % and finished at 87 %. With that charge we would be set for Saturday’s trip to the zoo.
-
- Dash upon arrival at Burlington DCFC apx. 39 km from Bellingham. Apologies for the poor photos I will have to improve my photos for blogging.
-
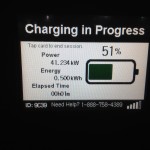
- NRG EVGO DCFC screen shot at Seattle Premium Outlets at Tulalip.
-
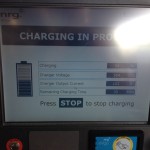
- DCFC screen shot at Magic Nissan, Everett, Wa.
-
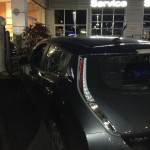
- DCFC at Magic Nissan, Everett Wa.
-
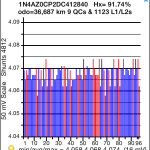
- Leaf Spy data at the end of day one.
-

- Battery temperatures as reported by Leaf Spy at the end of day one. Overnight ambient temperatures were ~ 12 *C. The battery temp was just below 25 *C the next morning.
Click on any image to see a full-size gallery.
Saturday morning we had 87% in the battery as we headed 28.4 km south and downhill to the zoo. We arrived at the zoo with 66% remaining and spend the whole day at Woodland Park Zoo. There is a home charger 5 blocks away from the zoo listed on Plugshare. Prior to departure I had made contact with the owner of this home charger and he graciously agreed to provide all day parking and a charge should I require it. Due to our quick charge the night before at Magic Nissan we decided to forgo this charge.
The zoo was great- our whole family had never been to a proper zoo before. In planning our zoo trip I had asked friends and colleagues if they had any advice for the zoo visit and I didn’t really get anything useful. What I did learn was that most big mammals are resting during hot afternoons, so if you want to get good views or photos of the “big guys”, visit them early or late I suppose, but at midday they were lazing around.
After visiting the zoo we proceeded to Bellevue Square Mall via the I90 bridge as the other closer bridge is now a toll and I didn’t want to deal with that as a non-resident. The views crossing Lake Washington were spectacular as I had never really explored this area of Seattle before. Bellevue Square Mall area was VERY busy at 5 pm and difficult to turn left into approaching from the south (because we too took the I90 bridge). Once we got into the mall we were not near the charging point I was planning to be at (there are two EV charge areas at Bellevue Square.) However, signage in the parkade was EXCELLENT and with EV Charge signs and arrows at every turn we found our way to the other EV charging area.
Our charge location at Bellevue Square had 10 designated parking stalls with 5 ChargePoint kiosks, each with one L2 handle and one L1 socket. Potentially 5 EVs could charge at L2 and five could charge on L1 if you had your OEM EVSE with you to plug in. There were two Leafs and one BMW i3 parked. Both Leafs were charging while the i3 was not. Two of the ChargePoint kiosks I first tried were only releasing the access hatch to the L1 socket and NOT the L2 handle. There was some problem with those kiosks which proved to be quite frustrating. We moved the car again and tried the third and last Kiosk which did release the L2 handle and provided us a charge to 100% for $5.53 USD while we were at the mall for dinner. (Lesson learnt, when encountering problems, test the L2 charge kiosk before you move your car).
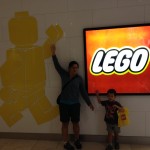
We also visited the Tesla store and for the first time ever and I got to sit in a Model S and my son got to visit the Lego store for the first time ever and purchase a small action figure set. If only the Tesla came in a full fledge wagon version a la Audi A6 Avant with trailer hitch it would have me salivating (yes I know it is a hatch back and it does have generous storage space as it is, but I like the wagon look although it is less aerodynamic).
-
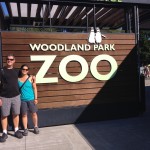
- New West EV Family at the Zoo. David and Wendy. Noah was running around.
-
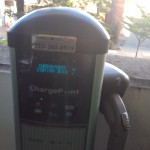
- Malfunctioning Chargepoint L2 at Bellevue Square Mall.
-

- My Son Noah in the Lego Store
-
- Noah and Wendy leaving the Lego store.
-
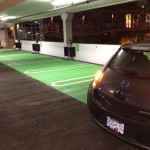
- Returning to the Leaf at Bellevue Square Mall.
-
- Leaf Spy Data after day one. Note temperatures nearly 40 *C.
Click on any image to see a full-size gallery.
According to the odometer the distance we had travelled so far was about 300 km, about 2/3’s of the expected distance of our EV road trip. According to my drive plan we had planned to consume about 47.3 kWh at this stage, but in fact we had consumed about 41.2 kWh, or about 87% of expected. We were not averaging 110 km/h during interstate travel and this likely accounted for 50% or more of the overestimation and we were probably regenerating a bit more than anticipated. We were also not using much climate control at all as this was early September.
Upon leaving Bellevue Square Mall the drive back to the Everett hotel was to be 34.5 km and it seemed to be uphill all the way. Indeed my drive plan showed 100 m ascent over the distance which doesn’t seem much but I certainly noticed the ascent. Despite this we arrived back at the hotel with 73% remaining therefore using 27% of the charge to cover 35.8 km (planned usage was 38%) but we did not drive at 110 km/h.
Recap of the Numbers for leg one of our Seattle Zoo Trip:
| Trip Leg | Distance (km/h) | Planned % used | Actual % used | % discrepancy |
| Home to Bellingham DCFC | 72.3 | 77% | 57% | -20% |
| Bellingham to Burlington DCFC | 38.7 | 40% | 31% | -9% |
| Burlington to Seattle Premium DCFC | 45.3 | 47% | 33% | -14% |
| Seattle Premium to Everett Hotel | 25.9 | 30% | 19% | -11% |
| Everett Hotel to Zoo | 28.4 | 24% | ~19% | -5% |
| Zoo to Bellevue Sq. Mall via I90 | 24.5 | 17% | No data | No data |
| Mall to Hotel | 34.8 | 38% | 27% | -11% |
So, this data shows that with a 100% charge I could potentially have left from home and skipped the DCFC at Bellingham and drove directly to the Burlington DCFC. This should have used 88% with a cushion of only 12%. If heating or A/C was required, or there was rain, it could make this leg very tight. Alternatively we could have easily skipped one of the other DCFC’s at either Burlington or Seattle Premium. We know and like these malls, and I wanted to test my RFID cards and fobs after all the effort to get the them.
From the Zoo to Bellevue I neglected to properly record data due to my frustration with the L2 ChargePoints.
On my next post I will report on the final leg of the trip to Seattle centre, our return trip to New West and summarize my thoughts.
Signing off,
The David and the New West EV Family
- The New West EV Family Goes to the Great Wolf Lodge - August 30, 2016
- Day Trip: The New West EV Family goes to Whistler for the Day - January 27, 2016
- New West EV Family Goes to the Zoo – Part 2/2 - November 22, 2015
Pingback: New West EV Family Goes to the Zoo – Part 2/2 | Kootenay EV Family
Pingback: The New West EV Family Goes to the Great Wolf Lodge – Kootenay EV Family